Sunday, October 28, 2012

Duct Tape Learning

laser cut snowflakes I created
This is my 100th post! I know I should be sharing more, so I"m going to try and share the happenings in my Technology and Design class for the rest of the semester.

The title of this post hopefully got you thinking about what duct tape learning. When we think of duct tape we think of fixing, repairing, creating constructing, etc. That's exactly the kind of work I want my students to be doing right now. Using duct tape also means we aren't always going to be super precise and there is room for constant improvement.

Student prototype cut and etched 
Our current project is based on a challenge I gave students to develop a product from start to finish that can be sold a one of our community craft sales in about 3 weeks. Students are in small teams of two and  have 1 month to bring a product to market. I am guiding them through this using a version the design process as set out by IDEO's Teacher toolkit. I highly recommend that any teachers who would like to give their students a big idea challenge to check this toolkit out. I'm adapting it as I go because I do find that certain steps are quite laborious and tend to drag on for students.

What has really helped me from the kit is how to frame questions for students to reflect upon and share their learning with others at each step of the design process. We are going to be doing quick daily 'tailgate' meetings, and 2-5 min team presentations that will be opportunities for formal feedback from myself and peers. Tomorrow we are starting team blogs and I'm going to tell students to take our their smart phones and use them as much as possible to document their product development. I'm still struggling however to get to that stage where students reach a deeper level of understanding of why reflection and public sharing of their learning is so important. Getting some students to blog with or without writing prompts is a challenge for me right now. I'm also struggling with students who want to 'get it done' as quick as possible and are waiting to be 'spoon fed' where to look for ideas or how to use a certain aspects of the tools we are using.


eraser and marker holder 
Students have gone through the DISCOVERY and IDEATION phases of the design process as of last week. One key element to the design process is that at an moment the process can cycle back to the beginning and start over with new ideas if new information is learned, or challenges present themselves. Case and point was a group who wanted to create puzzles that stand up and are animal shaped. They did a few sketches, designs in Inkscape (more on this in another post), and did a test cut with the laser cutter. The wood they chose was a 1/2" piece of plywood, and the laser cutter couldn't cut through it without totally charring the wood because it took 4 passes to cut the test circle. Back to the drawing board, and the group decided to do a 2D Christmas puzzle out of 4mm thick wood instead. Back to DISCOVERY and  IDEATION!


Most students have moved on to EXPERIMENTATION. This is where it gets fun. While one student is designing decorative wall hangings that look like cutting boards, another is finding out how to make a 2 piece ornament that has a spinning centre piece. Each day I'm also working on demonstrating how to take and idea from research, sketch, prototype, analyzing the prototype and creating a final product. One of these was a holder for my white board eraser.

Duct tape in all sorts of colours and a prototype wallet
The title of this post was inspired by a student who is choosing not to do a Christmas craft or something wooden or even acrylic jewellery or keychains. She is choosing to make duct tape wallets. I've even supported her by purchasing over $50 worth of duct tape! The skills to make a duct tape wallet are very specific and from the prototypes she has made I'm very impressed. The work is tedious but her attention to detail makes it a true craft.

But she's made a lot of them before.

I've asked her to do something that is out of her comfort zone by challenging her to diversify her product line and make other models of the wallet. A clutch style for women, a slim wallet for just a few cards and cash are some other ideas for wallets. Pricing, packaging and promotion will also be a good challenge for her.

This week groups transition at different times from EXPERIMENTATION to EVOLUTION where feedback from people in our community will influence whether or not they change their products, pricing or packaging or all three!

All of this is pretty experimental for me. I've given a lot of freedom to groups to pick almost anything they want to make, and now I'm going to support teams as they need guidance or technical help with tools on the computer. What's kind of cool right now is that I've got students designing on paper, on Inkscape, Corel, with cardboard and everywhere in between!

If you want to check out my wiki where I've made my first feeble attempt and organizing this crazy process check it out here. I'd also love to hear your thoughts on helping students through reflection for deeper understanding of their learning. I'll write an update next week with more student prototypes.


Wednesday, September 19, 2012

The Early Bird Gets the Laser Radar?

Great fall morning here in Cold Lake! I'm up WAY earlier than normal and off to school to check out the project of 2 students in my Technology and Design course (temporary name until something better comes to mind).

The premise of the class is for students to get big idea challenges/questions and have them use the design process to attack them. They will then use the digital tools provided to help make their ideas become a reality through rapid prototyping.


The current question students have been asked to tackle is "How might we create a better CLHS experience?" Two of my students have been focusing on the fact that we don't have a safe drop off zone for parents to eject their children in the morning. They thought that we should look at designating an area and then make signs in my class with the vinyl cutter and laser cutter- great idea!


They've been interviewing our administration, are going to talk to the City of Cold Lake, have written letters to the mayor and council, and are even enlisting the help of the MD of Bonnyville School Resource Officers this morning. One issue they identified is that there are no posted speed signs in the entrance area and parking area at our school (which is connected to our recreation complex and community college. This is of course, why I'm up so early.

Today they are going to set up radar with Officer Prockiw and Officer Tomaino to find out if speed of vehicles in the parking lot really is an issue and then will determine if they need to ask city council to post speed limits. Very cool. I'm enjoying this process because students are super engaged, and it doesn't bother me that I don't really know where their final projects will end up!


Sunday, March 25, 2012

Students with Lasers? Yes Please!

Tuesday last week as a great day. I had a 3 hours of impromptu PD thanks to Mother Nature. A freak dump of snow caused our busses to be cancelled. We only had 1 student in our whole school. A colleague of mine Brent Stasiuk gave me a ring and asked if I wanted to take a trip to the French Separate school down the road to see some amazing technology in action.

When I arrived I was in awe of what they had set up. Light tables, vinyl cutter, a Dewalt filled shop, and the highlight for me- a laser cutter! I've been pining over the idea of a laser cutter for a while now, ever since I toured school in Sherwood Park with David Hay.


At Ecole Voyageur the Phys Ed and CTS teacher is Marc Hamel. He is actually a former colleague from my school division but he has a great teaching position at this school now! We talked about CTS instruction and evaluation, how CTS is largely performance/skills based. It is difficult to give a student a 73% on their wood shop project. We also talked about how CTS is unique in this area because a student often gets to see right away if they have done something 'wrong' in a physical way and feedback is immediate. I think true learning happens from this type of project based environment.


Without a doubt, the coolest technology I saw there was a Epilog 35W laser/engraver. The machine has an 18x24" bed which can do a lot of work in a school or business. Marc showed me how etching a design into a material is as easy as printing a piece of paper. The laser can do vector cutting, which is cutting through a material to make a shape, and raster cutting/etching, which is taking away parts of the material to leave a design behind, which can be at different depths and can be different shades. The name plate seen above was made with the machine! Marc uses Corel Draw to import graphics from a library, adds text and then literally clicks 'print'. A printer driver pops up with speed and power options to select. Once these are selected the job is sent to the laser and stored in the internal memory. Marc showed me how to focus the laser just above the wood we were using, then he sent the laser 'home' and clicked 'Go'. Here is my design being cut out.


The image is a shrimp bowl with my name. It turned out awesome! I'm impressed with the detail and precision that the laser gives to the final product. The machine can cut and engrave dozens of materials. While there we also cut ovals through 1/4" cedar which were so sharp and smelled great! I love the smell of burning wood!

My mind has been racing with ideas for projects after this visit. Marc shared the work his students are doing and how he makes products for people in the community, like puzzles for elderly in the lodge who are working on dexterity and memory, and custom cheese boards.

Some ideas that I have for projects would require digital work to produce physical things:
- chess board in the laser cutter, and chess pieces in Google Sketchup to our Makerbot.
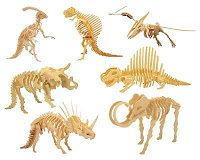
- dinosaur bones puzzles
- puzzles
- signage around the school
- game design and re-design (another post of this to come).
- coasters
- engraving iPods, iPads, iPhones and other electronics
- custom boxes
- trophies and plaques for school awards and sports teams
- acrylic signage
- glassware for parent thank you's
- design projects that require multiple prototypes


What a great find in my own community! Thanks to Marc for all his time and valuable discussions. I'm drooling over what an addition like this to our school could do for a multimedia program. It would bring my vision of "maker spaces" one step closer. Giving students more choice and control of the products they produce, and allowing them to rapidly turn ideas into physical prototypes for changing and evaluating. This machine would open up so many opportunities for our students!


Creating Connections Between Digital and Physical Worlds

This morning my son Jack was trying to use a mouse to open a web link we have on our iMac desktop. He's 5 and is fully capable of working any iPhone, iPod touch and iPad in our home. I saw him struggle a bit to move the mouse around. It wasn't easy for him, but eventually he was able to navigate to where he needed to click.

What struck me about this event was that with touch interfaces coming to so many devices, the connections between physical and digital things are become very seamless in our daily lives. This is not a new revelation by any means, but I'm concerned about the chance that people will lose the understanding of how things are made. I fully admit that I've spent most of my life existing and haven't given a second thought to how the milk jug is created, how coffee is made or how furniture is crafted. I've just reached a point now where I do want to know. I'm enjoying the show "How It's Made" even more now.

People who know me would say that I use technology. A lot. But one thing that they wouldn't say about me is that I work well with my hands to make physical things. People don't refer to me as a 'handyman' or seek me out when they want to do drywall or crown moulding.


On a personal question to improve my skills I've been looking for way to change that by using technology to create physical things. To take things out of virtual spaces into the physical realm. The purchase last semester of Makerbots was my first foray into this area. These machines are amazing. I built them with my hands, which was extremely satisfying. Last week I even made a cup from a design at Thingiverse to hold pushpins on my desk.

What I love about the Makerbots are that they give the designer that satisfaction of taking something that is abstract and virtual and turn it into a tangible, touchable product. School deals with so many theoretical and hypotheticals to encourage students to think at a higher level, but I think that critical thinking and problem solving can be achieved just as well through the iterative process. I've pushed myself out of my comfort zone and have spent a few days in the shop this semester learning from students. Last week a student and I created a hamster rig in about 30 minutes to film a movie with our life skills class. It was primitive but worked perfectly!


As a teacher have you seen a disconnect among your students between the physical and digital worlds? How can we best utilize these two different spaces in combination to benefit student learning? A big question, I know.

Monday, March 12, 2012

Creating Learning from Crappy Situations


Last Friday I was away working with some of my awesome broadcasting students and had a substitute teacher take my class. While I was away our director ran the newscast as we always do each day at Cold Lake High School, and everything seemed to go off without a hitch. The news had some audio issues with a mic and our weather man had to pinch hit as an anchor, but nothing out of the ordinary. 

On Friday night at the other school where we were broadcasting basketball games a staff member and a couple students asked me if I had seen the news and what 'that team had done'. I hadn't. Turns out that my technical director (switcher operator), chose to post an subtle, but not so subtle message on our 2 minute countdown to the news promoting a party that weekend. My first reaction was anger, but it quickly turned to disappointment. So much so that I lost serious sleep over it Sunday night before I dealt with it at school. 

This morning we had a team meeting for a newscast post-mortem and I asked the team how things went on Friday. The rest of the team talked about how they weren't very serious and things barely got done, but the news was complete in the end. No one mentioned the elephant in the room about the party announcement. 

When I asked about the announcement the technical director took full responsibility for the words that were put on the screen and he apologized to the team. I asked the team what they thought should happen (knowing exactly what I was going to do) and they said that our tech director should be taken off the switcher. The decision to put the party location on the screen was that of the individual, but it was important to remind them of the fact that it reflects poorly on the all those at RTV. 

Some felt the individual should go on air to apologize, other felt that losing the position of technical director was enough. In the end I offered something in between. I brought up how Global Edmonton's Mike Sobel made some disparaging comments towards a woman on air last year. He was immediately taken off air by Global, but then after his public apology was able to go back on air.  


In our case the student was removed from the job, given a new job as a script writer/communications person for our news crew, and has been told that they will work up to their position again in the future. 

The lesson here, give kids a chance to make it right. I suggested we send out a press release which is what that student did this morning. We researched press released together and I had my student director approve the message before it was sent out. Soon after I received a thank you note from our principal as well as a comment from a staff member who said that it was a very professional way to deal with the situation. 

Overall it turned a crappy situation into a positive learning experience. I'm proud of my news team for how they handled our morning meeting about the incident and how well the student handled it and has made steps to make it right publicly for our team. 


Wednesday, January 18, 2012

Design Studies Update

With the semester winding down things I'm thinking about the past three months with my design studies class. More than anything, what I hope to get from this three month coup of the class is some serious learning from the students and myself. Here's a quick look at how things are going.

Enthusiasm FTW!
Students who are motivated in the class and are already tech savvy are rocking the Kinder Toy Project . Others who were able to go with the flow in group work in video projects are finding it tough because 'it's so much work' as one kid said to me. The stakes are high here. Without a completed project students in my class will not be printing a toy for their kindergarten partner which will be disastrous and will literally crush the little ones.


Time- Where did it go? 
I need to give more time for modelling and working things out. The top students who've taken to Sketchup are just finishing this week. The middle of the pack probably needs another week, which we don't have. Not to self- add more time. Maybe we spent too much time making cardboard prototypes, but I thought it was important for them to do this step to learn about scale and form and the limitations of 3D printing. The Makerbot can't do overhangs of greater that 45 degrees very well. Any model with a 90 degree overhang. The image below demonstrates this. The cone was printed upside down and was successful because the overhang was just fractions of a millimetre each successive layer. The object below with the overhang would not print because the nozzle would print plastic into air with nothing to support it.


The Mad Skillz (is what the kidz say)
Fully admitting that I don't know all the answers has happened often during this project. When sitting beside a student discussing a problem I have been telling them I don't know, but here's what I think we could do. Then if that doesn't work, we ask the rest of the class. More often than not another student wanders over to share their knowledge to help us out.

Perhaps this project was a bit soon too with their introductory skill levels with Google Sketchup, and we needed some more foundations in scale and understanding the basic tools. Perhaps having them jump in was a good thing as well. When I wanted to learn how to build a 3D printer I jumped in too, and I made a lot of mistakes. I guess this may tie back to my point about time. The greatest challenge for us right now is taking a model of the walker toy, and intersecting it (welding it) with the students' model. What you see below is a successful intersection of two models were the negative imprint of one model is left in the other. This will mean that the walker bases will fit perfectly into our toys. Unfortunately, intersecting a model with a sphere doesn't seen to be working very well right now.


Outcomes Awareness
Communicating learning is very important to me, but I think this is where I'm falling down. Asking students to blog their progress has been OK, but the depth of their responses isn't where I like it to be yet. One thing I will take from this is I need to blog along side of them and use better guiding questions. Asking a new student blogger to demonstrate their learning in words about "their understanding of 2D and 3D forms" isn't an easy task. Transferring their modelling of physical things into words on a blog or even paper doesn't jive. Maybe video updates might work next time? Formative feedback daily is way more helpful than even a weekly blog. I'm not dismissing blogs, because I want the tool in my class. I just need more work on my end to make it more approachable for my students.


Technology
Did you know that technology doesn't always work? The Makerbot I built first has been running smoothly, but there is a backlog of designs to be printed. Occasionally the room temperature affects the print, or the nozzle height needs to be calibrated, so its takes some tweaking to get things just right. Realistically getting 1 model per class printed is a success. The second Makerbot I'm working on is giving me grief because of an electrical issue (that is my own) that I can't figure out right now. 20 hrs on each Makerbot build has been a lot of time- but I wouldn't change what I'm going for the moon!


Help! What ideas do you have about my class blogging/outcomes awareness, or maybe you're a Sketchup pro that can help us with best ways the intersect (weld) models together? Drop me a comment!


Kinder Toy Design Project

In December my design studies students and I travelled to do real field research with a kindergarten class. Seeing high school students paired up with little ones was a cool experience. I had this crazy idea and I wanted it to turn into an opportunity for my students. I've also started to develop the course as we go along on my class wiki, where you will also find other "personal projects". All are considered a work in progress!

Our Visit
They spent an hour talking with the Kindergarten students interviewing them to get ideas for our class final project. The class final project is to design a wind up walker toy for their tiny partners. From robots to dolls to christmas trees, the kindergarten students had amazing ideas for toys- they are are experts in this field after all.

Shoot Everything! 
If there's one thing that I can recommend to teachers out there is to take more video or photos of your students in action! It does a couple of things for me when I'm shooting video/pictures. First, it helps me get around to every student in the class. The loud ones sometimes get our attention whether they need it or not. Second, it allows you to document the awesome things that are happening in your class. Be proud of your students' work and share it so others can draw ideas from it. Additionally, when I take pictures of student work in my media arts class of their designs I tell them that I want to take a picture so I can share it because it's the right thing to do. Essays generally only get read by the teacher, 'scantrons' of multiple choice tests don't look very good on the walls, but pictures of students' iPod models or keychains are great for me to tweet out and share!

Here's an look at our class in action working with the wee ones. Blogger sucks at embedding the video so click on it and watch it in it's HD glory!


This post is a bit late, but it was a great experience to work with younger students. I'm really proud of how all students in my class were amazing when working with 5 year olds. They got down on the floor, sat in the little chairs and were heroes!